How to Download and Install a WordPress Plugin (or Theme)
Plugins are used to add functionality to a WordPress site. There are thousands of Plugins which are created by independent developers. The easiest way is to install the Plugin using the search feature. The downside to this method is you can only install a Plugin that is free. This post will guide you through the process of how to download and install a WordPress Plugin not found in the Plugin search area.
Firstly
If you have WordPress.com hosting, except for their Business plan, you wont be able to install plugin. Hopefully then you have a self-hosted website.
There are three ways to install a Plugin – Through the search feature in the Plugin menu in the Dashboard, Download and Install (the topic of this post) and installing it manually using FTP.
Download the Plugin
Unless they also offer a free version, paid WordPress plugins are not listed in the WordPress plugin directory. These plugins cannot be installed using the search feature (easy method) mentioned above. Instead you need to firstly download the Plugin, then Upload it in the Plugins area of the Dashboard as detailed below.
As an example I have chosen the Appointment Hour Booking plugin found at apphourbooking.dwbooster.com but any plugin you can download will work.
1 From the website that has the Plugin you want, find the Download button, which may go to another page.
If the Plugin doesn’t have a free version you will need to purchase it first. Then we’ll show how to download and Install a WordPress Plugin.
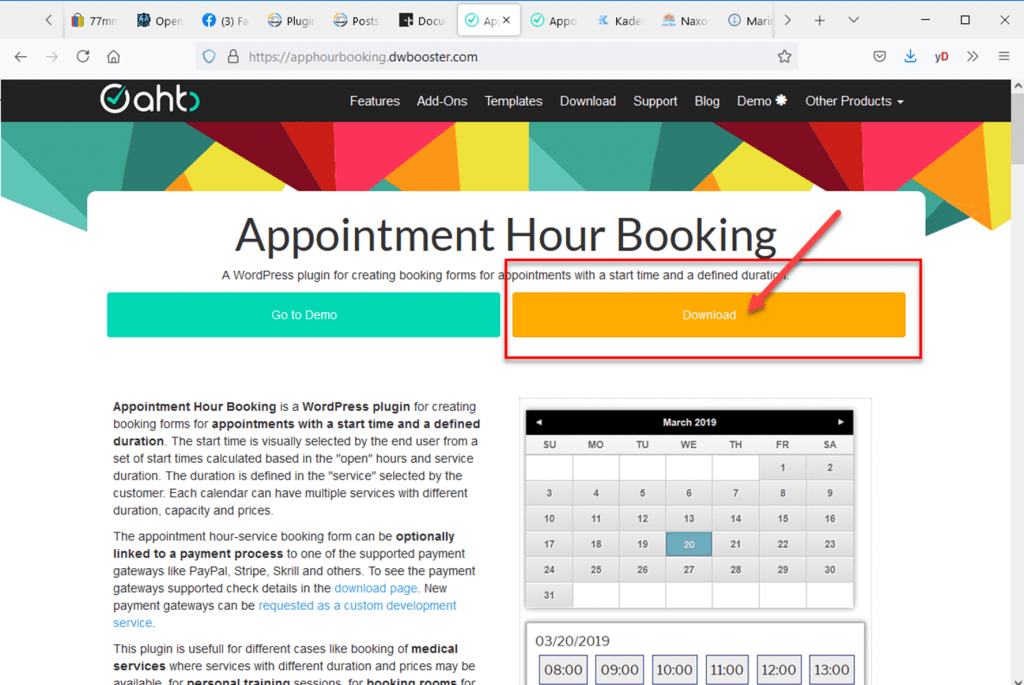
2 In this example the Download button takes you to another page which details the options of free vs paid
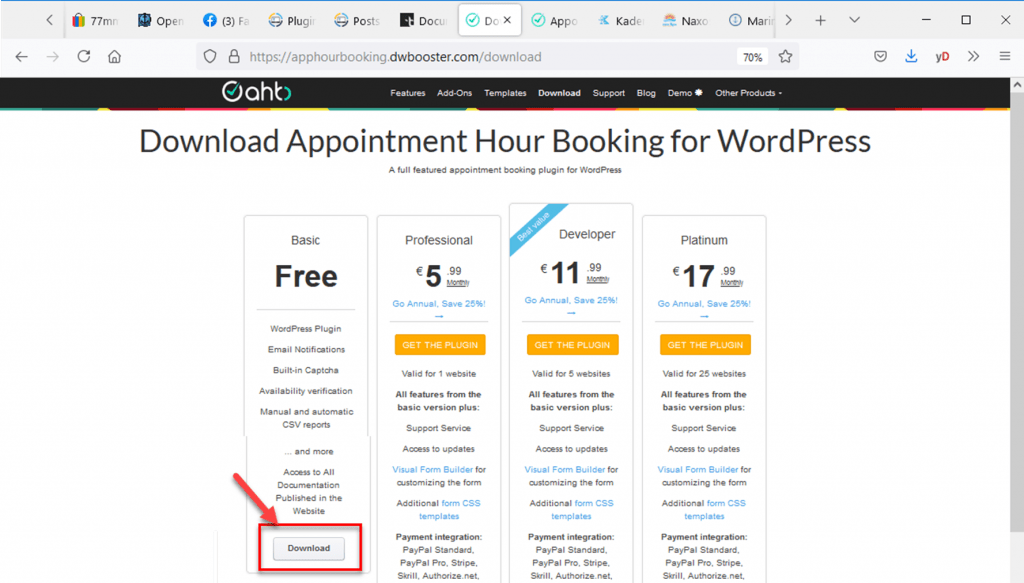
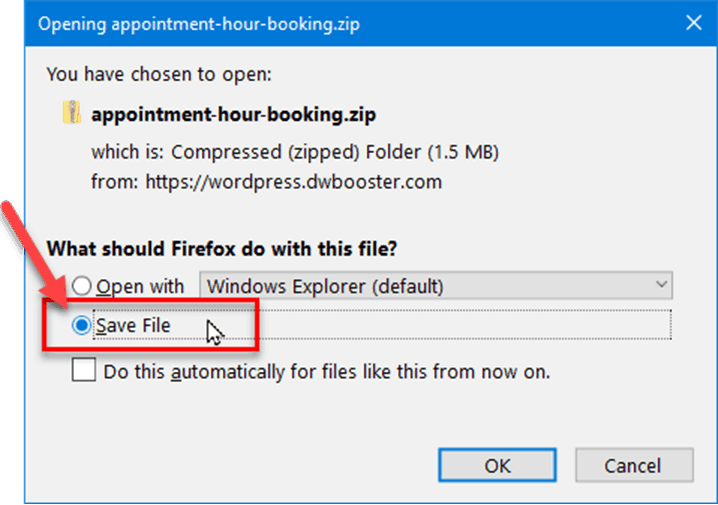
3 The Browser may give you the option to Open or Save … choose Save
The Plugin .ZIP file should have been saved in your Downloads folder. If it is not there you will have to find out where you Browser saves Downloads.
If you don’t see this option then skip this step.
Install the Plugin
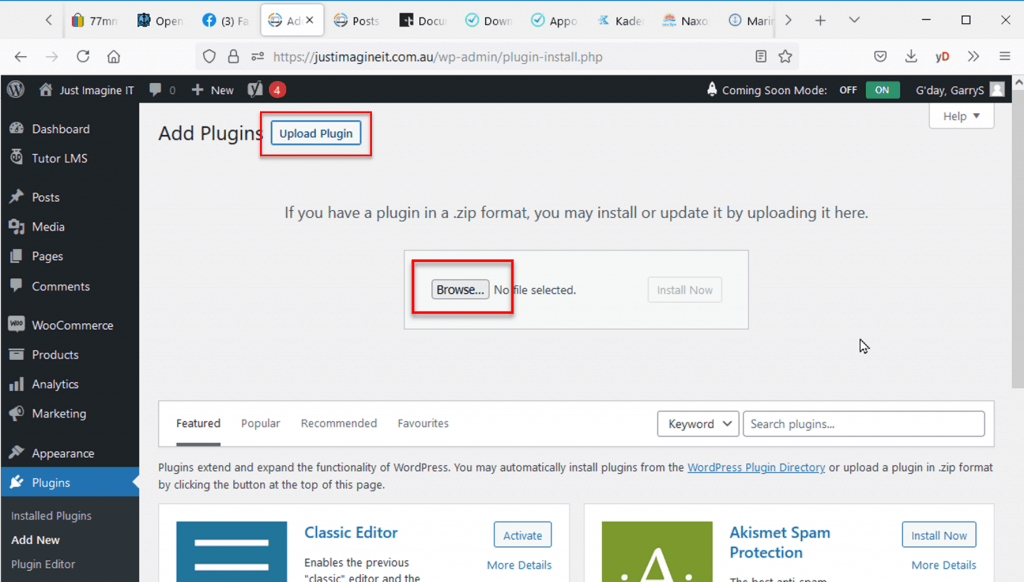
4 In the WordPress dashboard, go to Plugins > Add New

5 Click Upload Plugin and then Click Browse
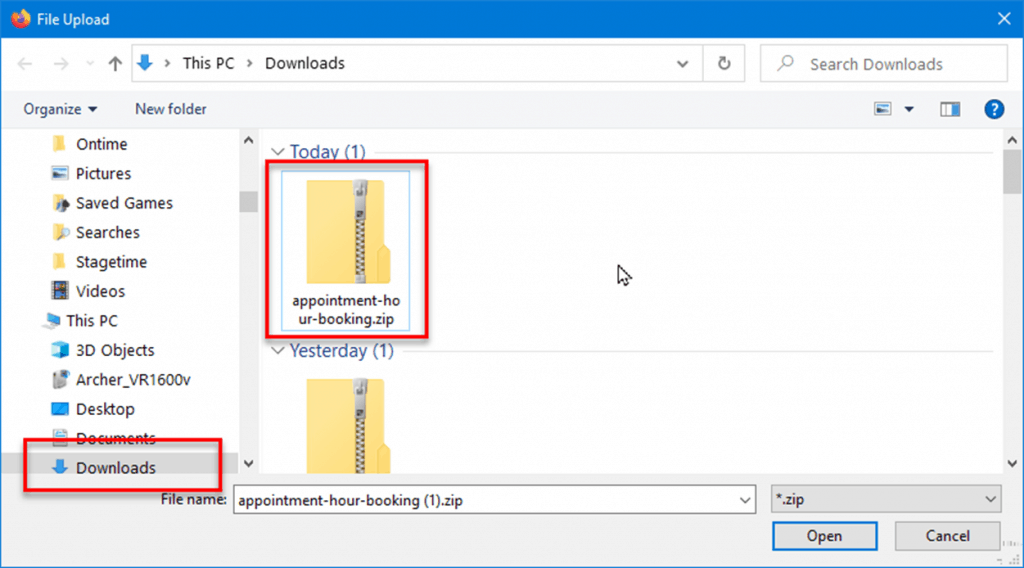
6 Navigate to the Downloads folder and if the files are sorted by Date the Plugin file (a .ZIP file) should be at the top of the listing.
Click once to select the .ZIP Plugin file and then click Open
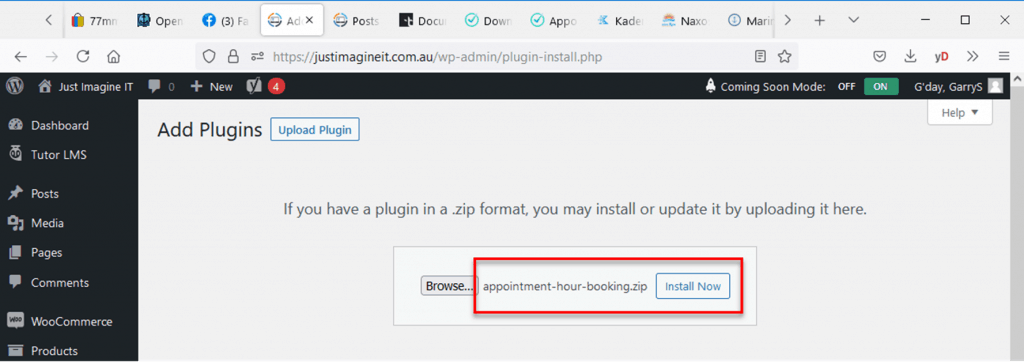
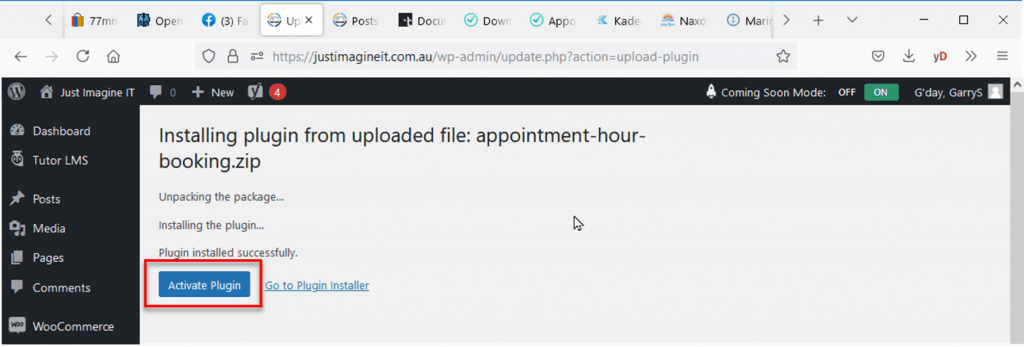
7 Check that the name of the Plugin .ZIP file is correct and then click Install Now
8 Once the installation is successful, click Activate Plugin
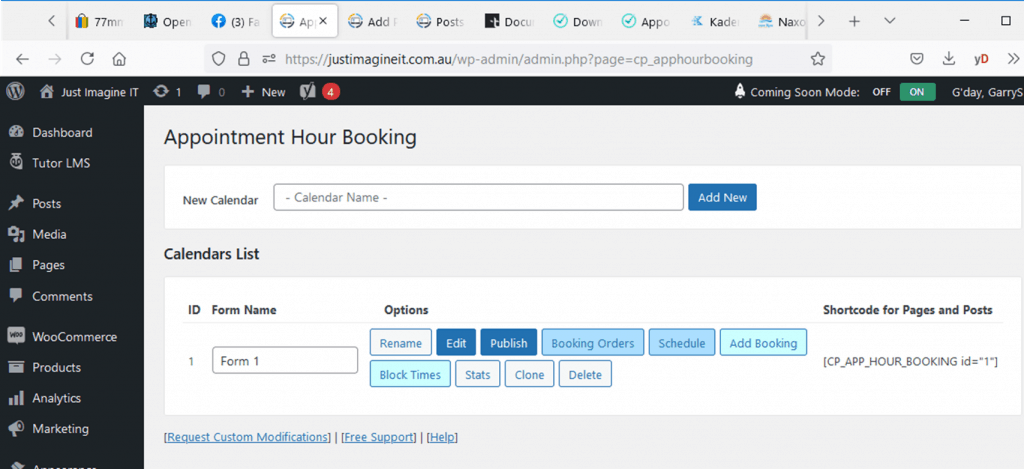
9 Depending on the Plugin installed, you might be taken to the settings for that Plugin. If not you will have to look to find where the Plugin has been added to the Dashboard.
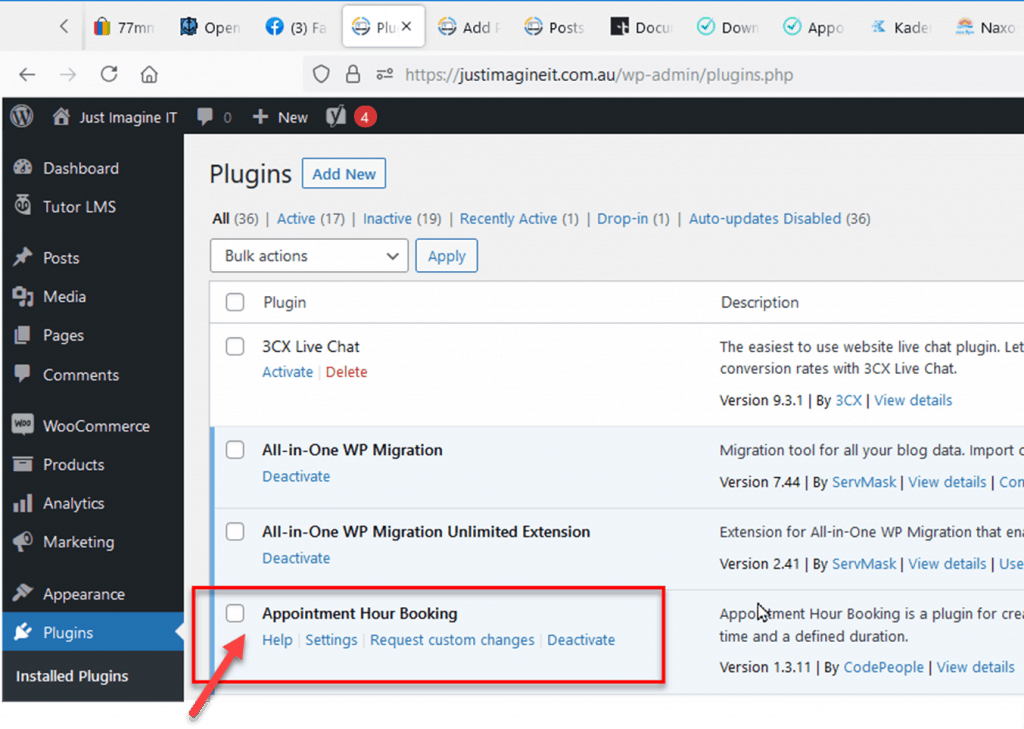
10 The Plugin will also be listed through the Plugins > Installed Plugins menu of the Dashboard.
All done. Now you need to change any settings necessary and apply the functionality offered by the plugin to your pages.
Themes
These same steps apply when downloading a theme. The only difference is you start at the Appearance > Themes menu