Develop WordPress on Your Own Computer (Part 2)
In Part 1 we installed Desktop Server (ServerPress)
In this Part 2, we’ll run Desktop Server and setup a local WordPress website
See also:
Starting Desktop Server once it has been installed
Stopping Desktop Server – shutting down the webserver
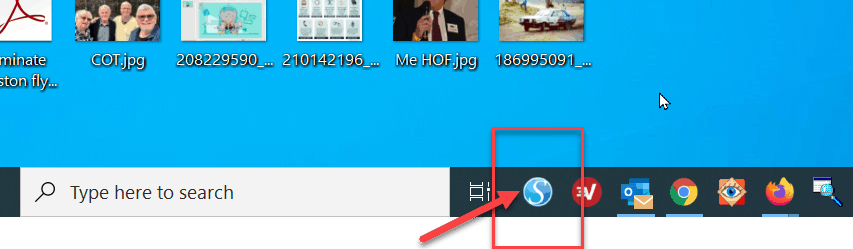
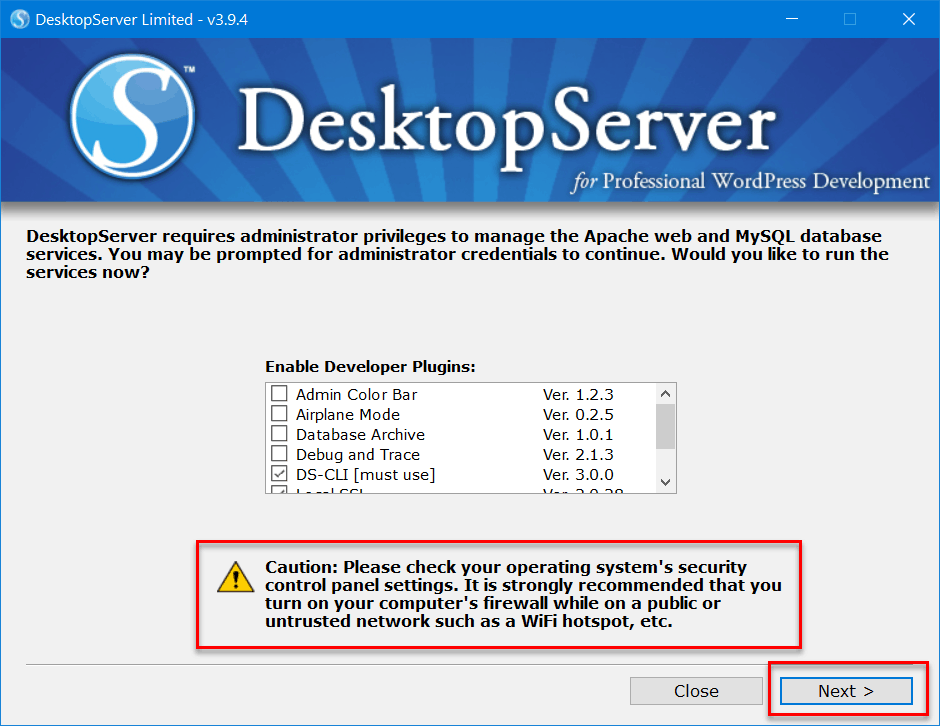
1 On the Taskbar, click the Desktop Server icon.
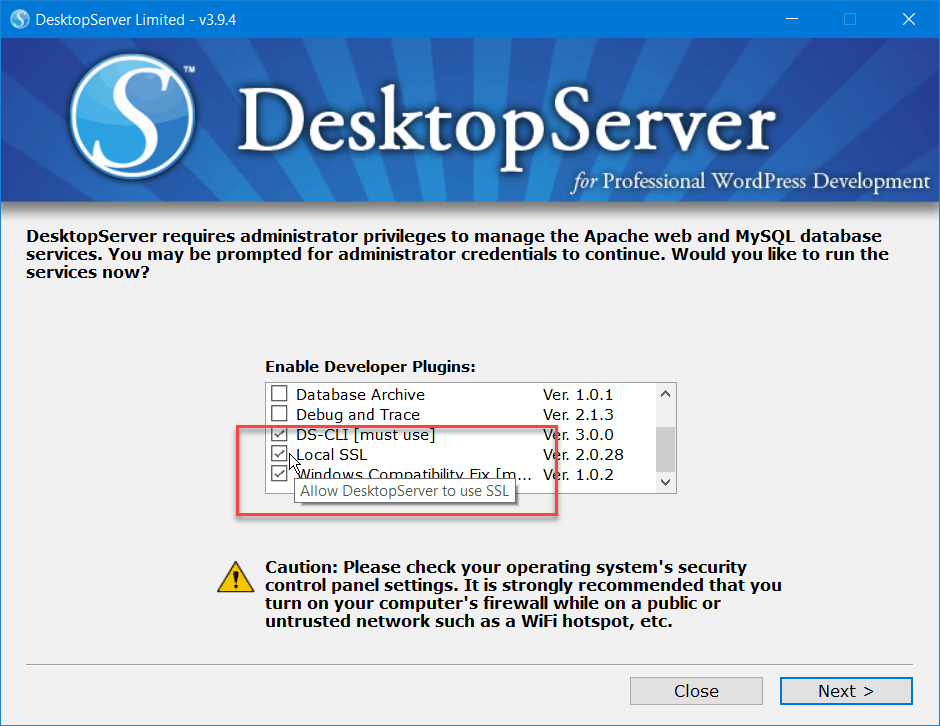
2 When the Desktop Server window opens, tick the option for Local SSL. This will simulate a Secure site
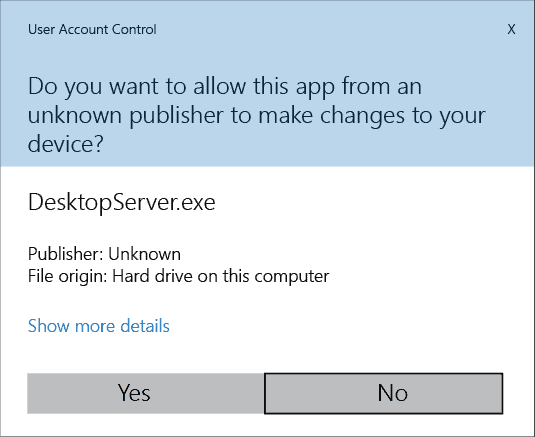
3 You might have to confirm to Windows that you want to run the program. Click Yes
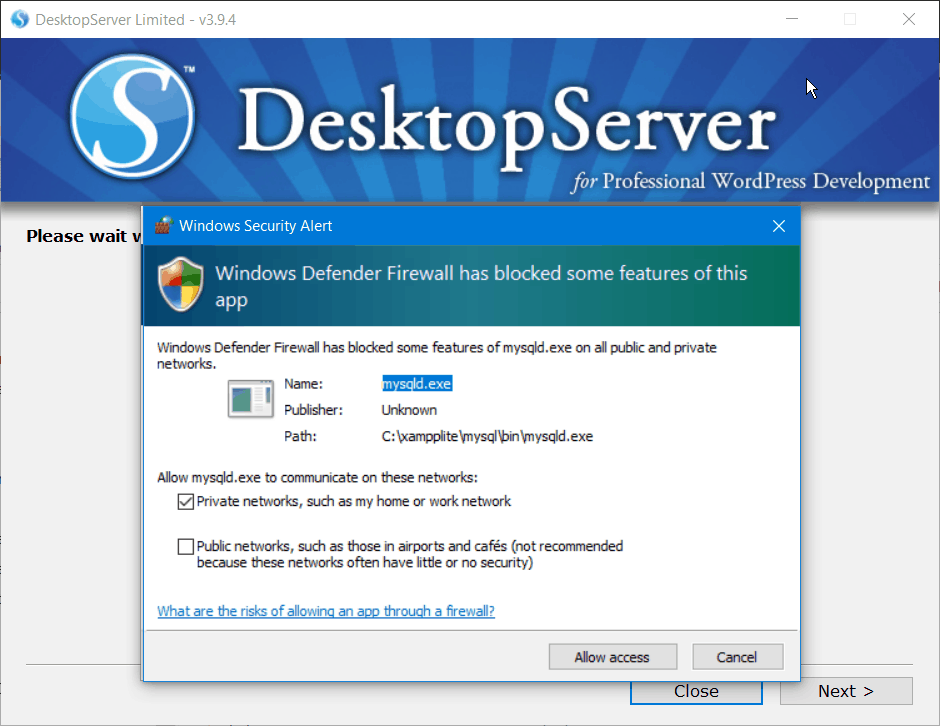
4 You will be asked to allow access through the Windows firewall for the MySQL program. If you wish, click the link explaining the risks.
You will need to click Allow Access.
DON’T tick the Public networks option!
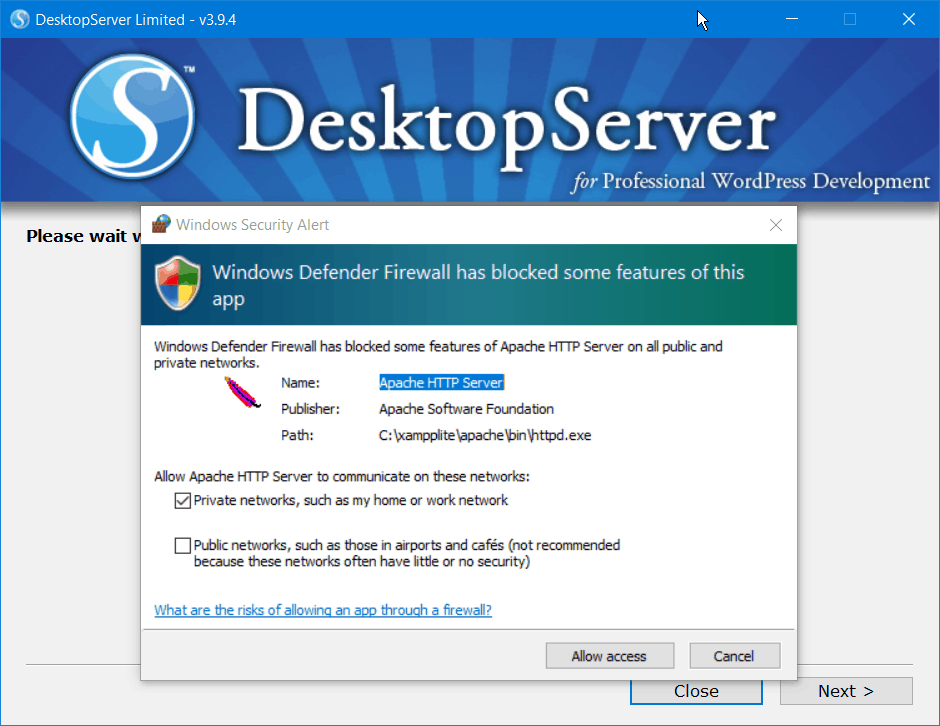
5 You will be asked to allow access through the Windows firewall for the Apache HHTP Server software. You will need to click Allow Access.
DON’T tick the Public networks option!
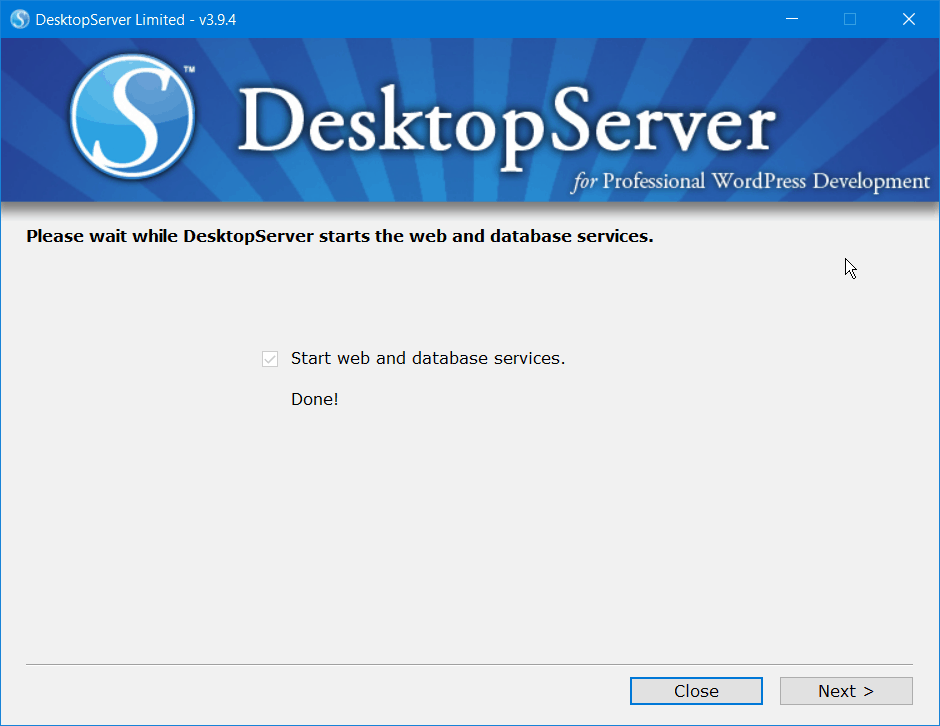
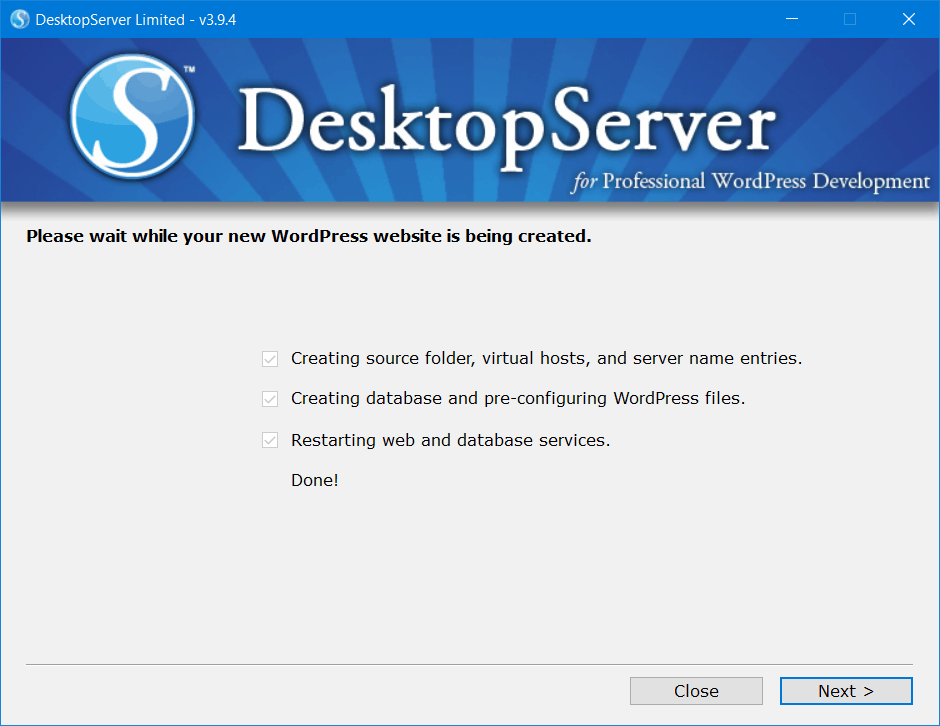
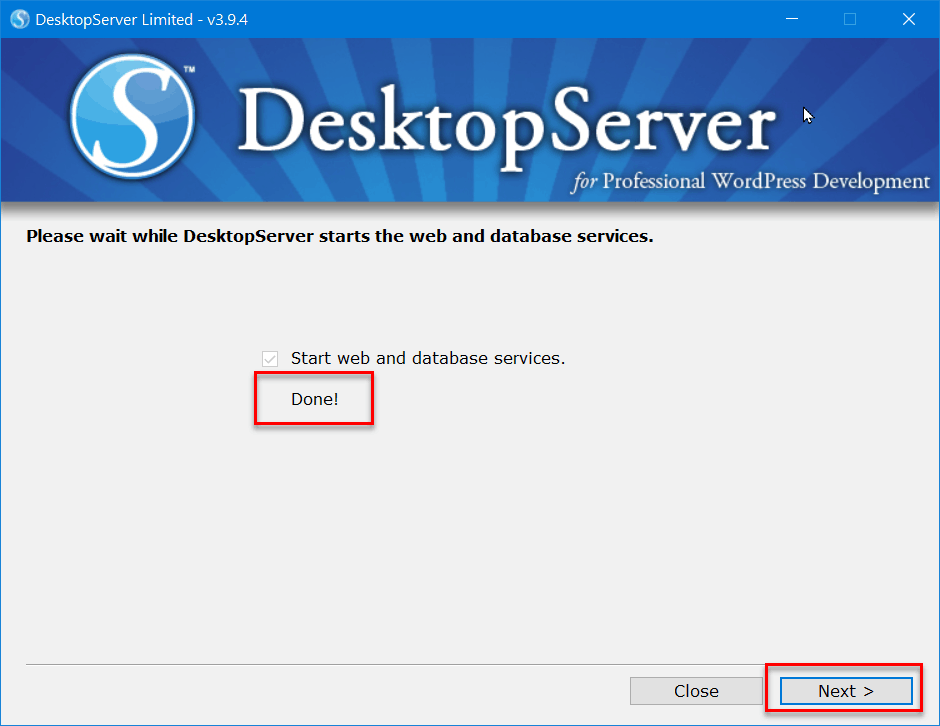
6 Tick the option to Start web and database services. After a short time you will see the confirmation Done!
At this point you computer can now act as a Web server.
Click Next so we can set up the WordPress website.
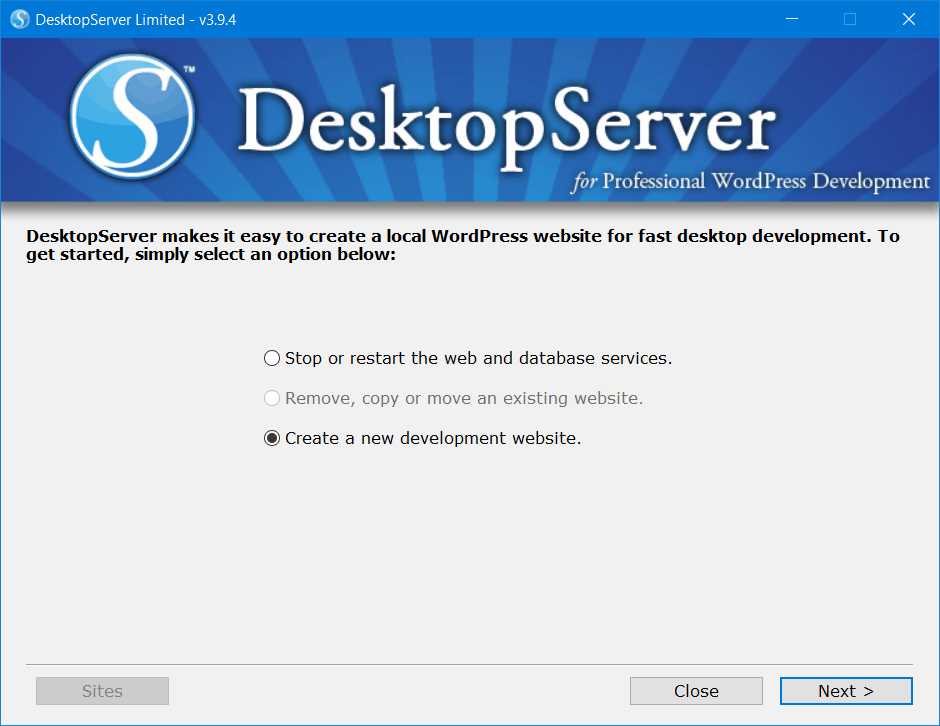
7 Click Create a new development website. Click Next.
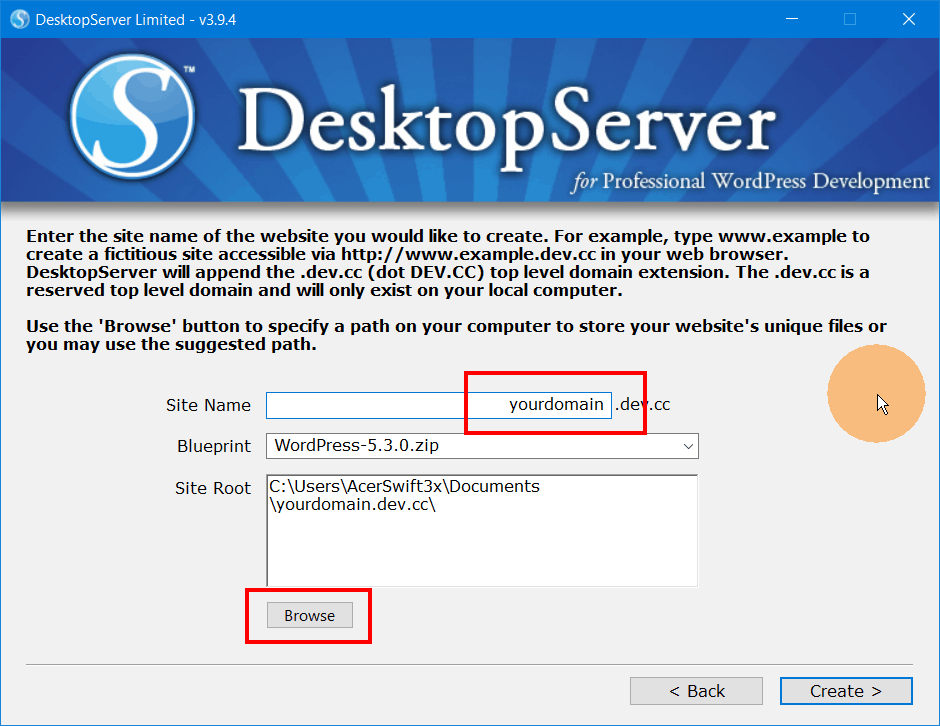
8 Type in what you want your Domain name to be. This is only on your computer and can be anything you like. It doesn’t have to have the www. at the start.
In this example the website Address (URL) will be https://yourdomain.dev.cc
[Optional] Click Browse if you wish to choose where the website files will be stored.
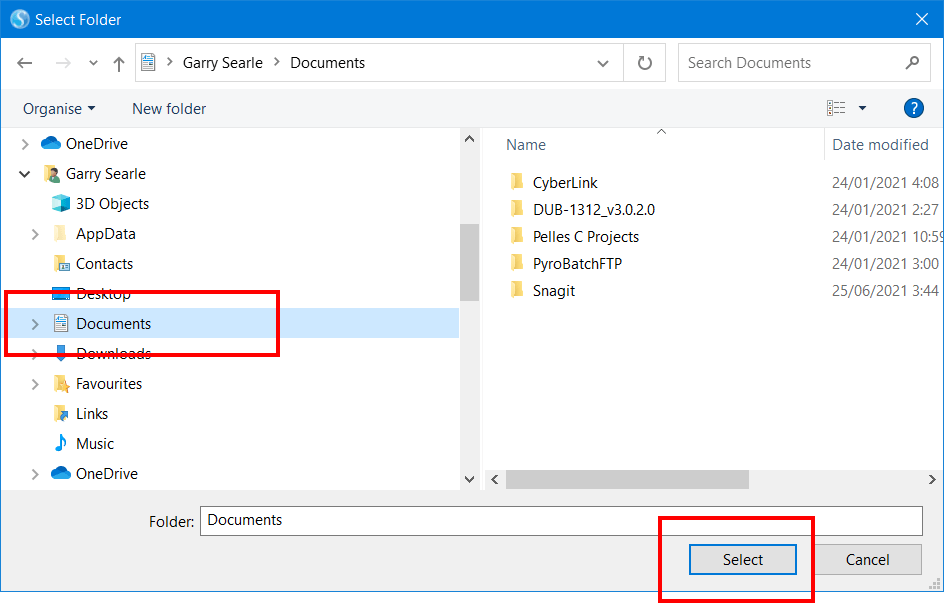
9 [Optional] Here we chose to store the files in the Documents folder. Click to select that folder and then click the Select button.
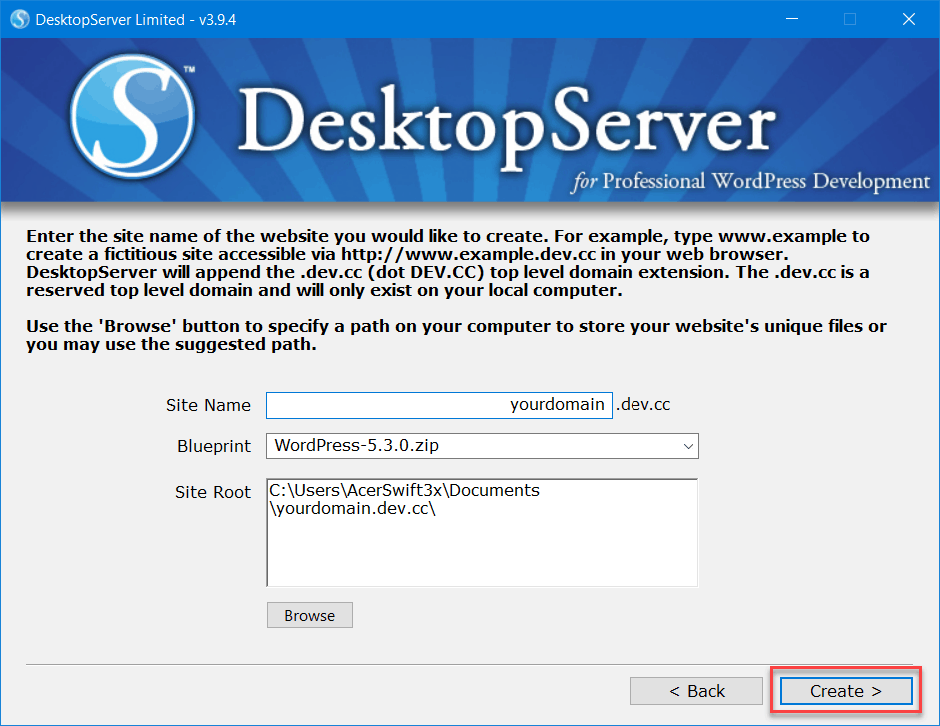
10 We have setup the Site name and the Site Root (file storage). Leave the Blueprint as it is. This is the version of WordPress that will be installed. You can update this later.
Click Create
11 After 10-30 seconds the confirmation Done! will appear. Click Next.
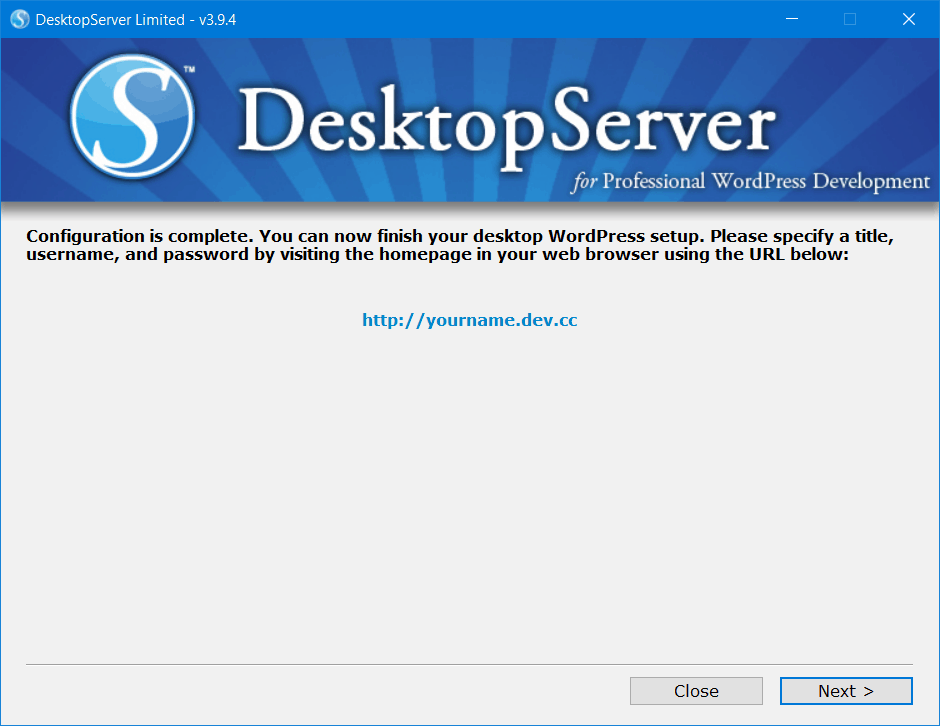
12 A confirmation screen will appear with the URL of the website shown.
You could click the link to open the website in your Browser, but we will click Next.
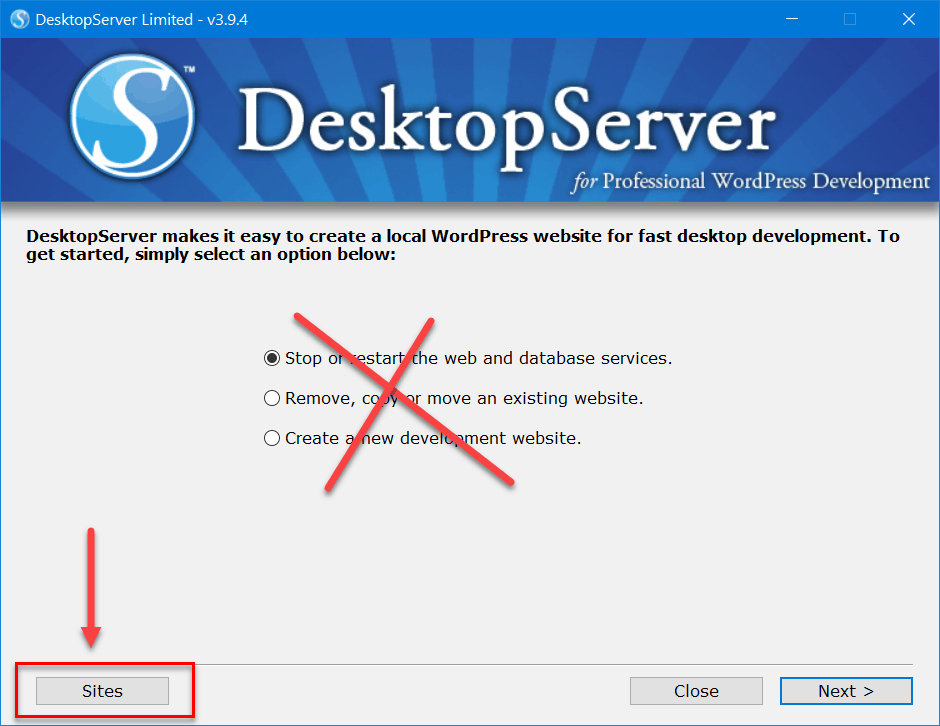
13 We are returned to an earlier screen where we clicked to Create a new site. We don’t need to do that again, instead click the Sites button.
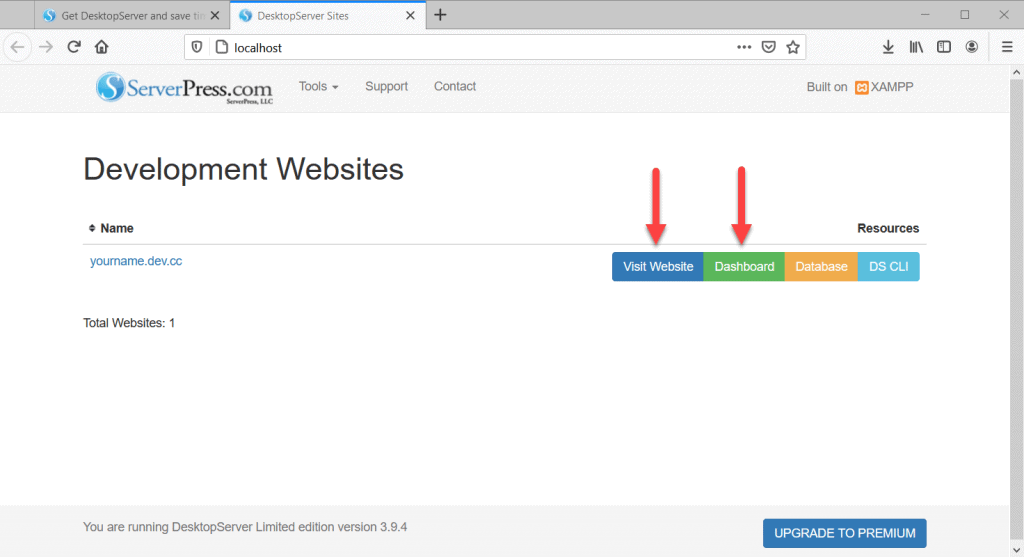
14 Desktop server allows you to create up to 3 websites with the free version, more with the premium version. Your browser will open and this screen will list the sites you have created. It has buttons to Visit the website, as a user, or go to the Dashboard to edit the site.
Database and DS CLI are advanced options and you wont need to use those.
Click Visit Website
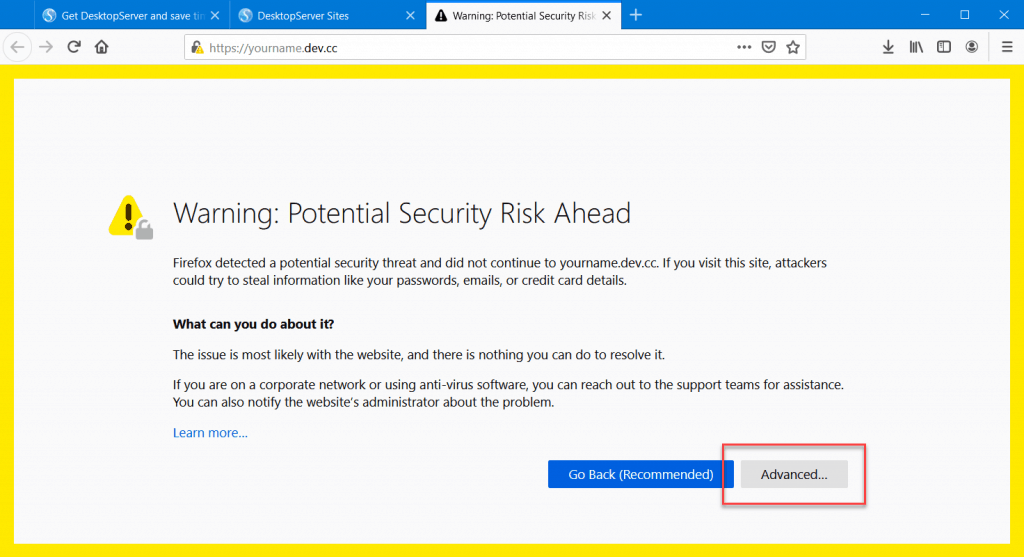
15 Some browsers will see Desktop server as a threat. This is simply because of the simulated SSL certificate, which the Browser can’t authenticate. Normally this would be a problem, but as this is just a testing environment it is ok.
If you receive an error like this you need to click Advanced to continue
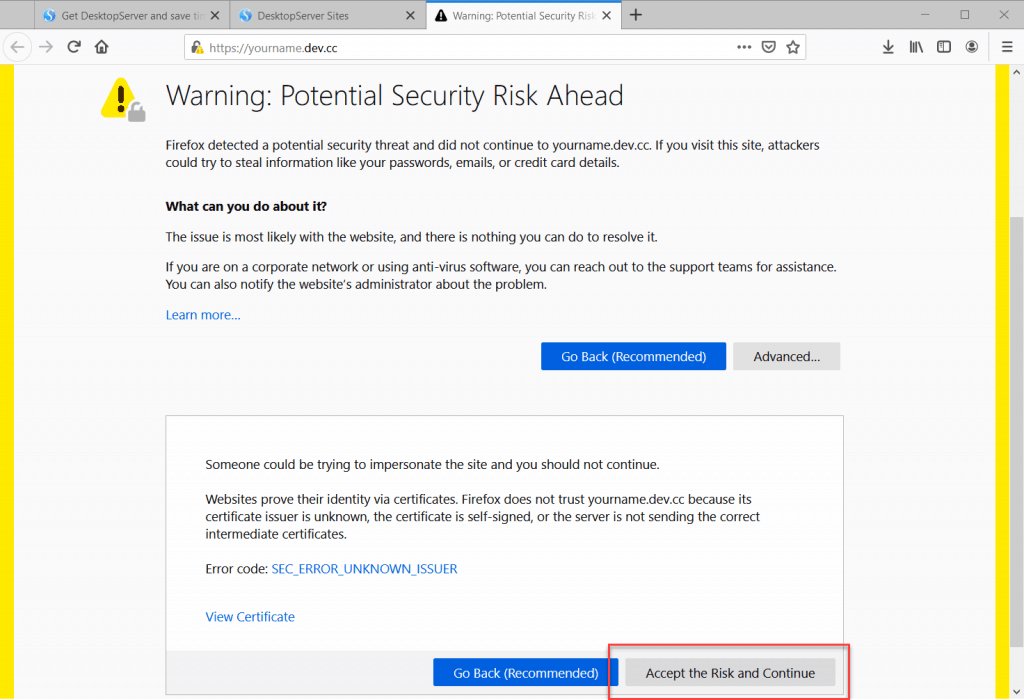
16 Click the option to Accept the Risk and Continue
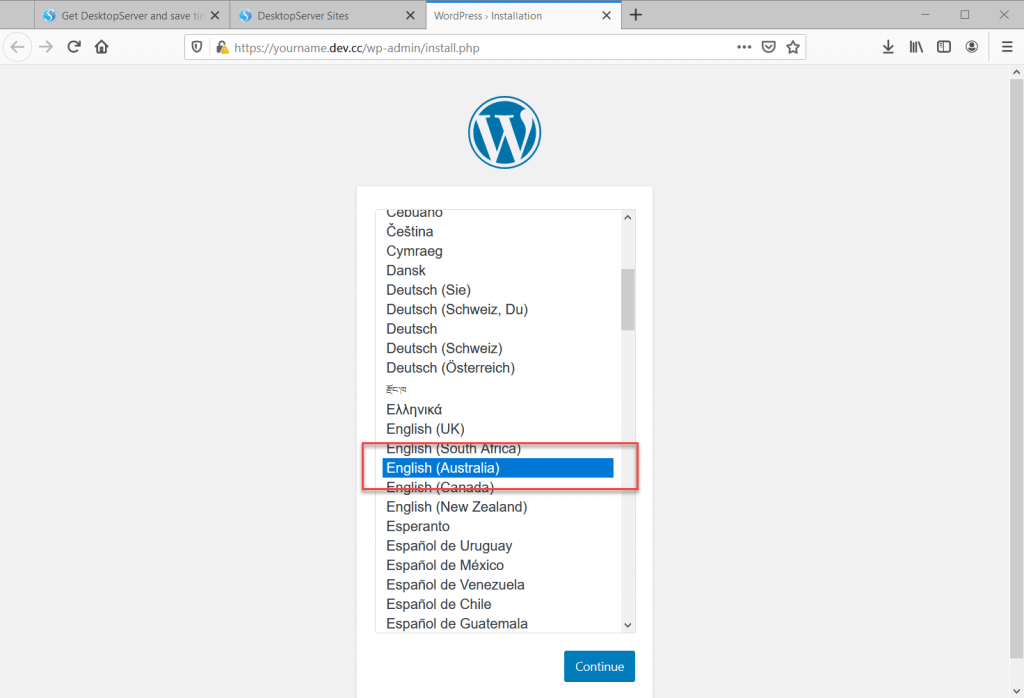
17 The installation of WordPress then starts. Choose the desired language. There is an option for English (Australia) and click Continue.
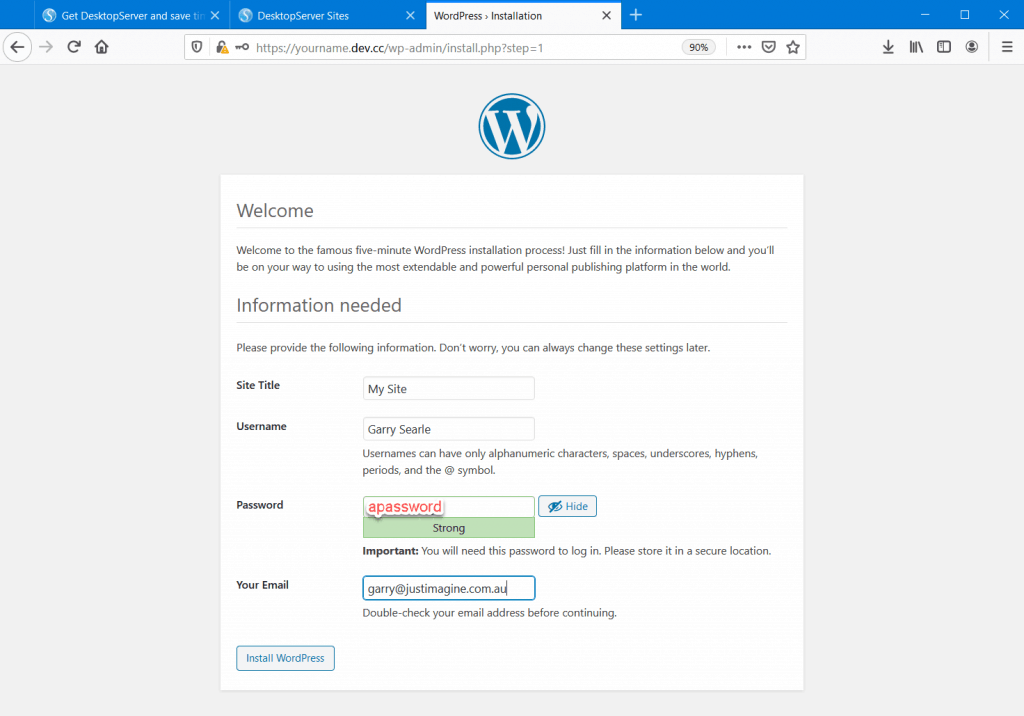
18 Enter the Site Title eg. Your business name or name of your blog
Enter a Username, Password and Email Address
Click Install WordPress
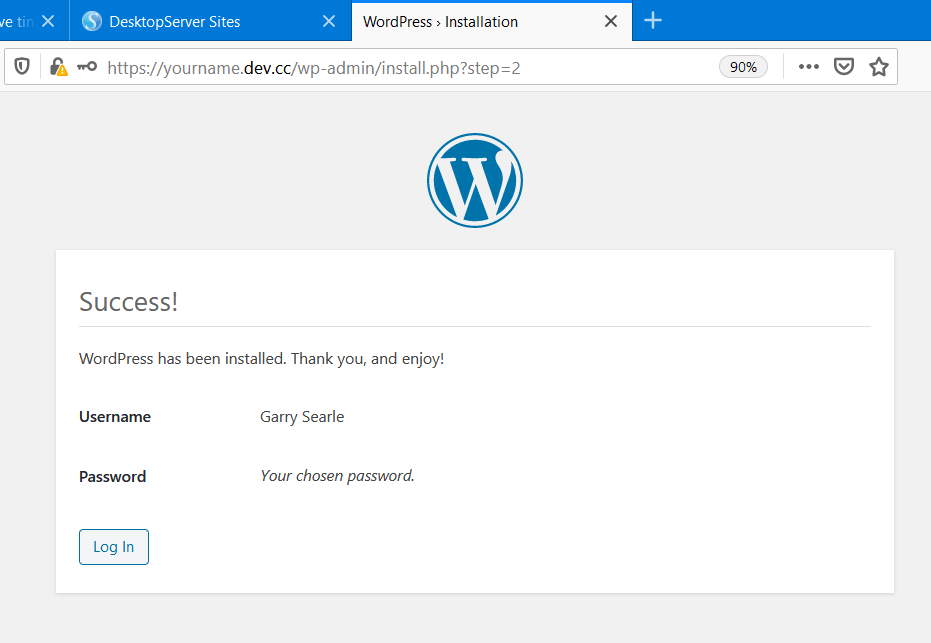
19 Within a minute or two you should see the confirmation that the site is installed.
Click Log In
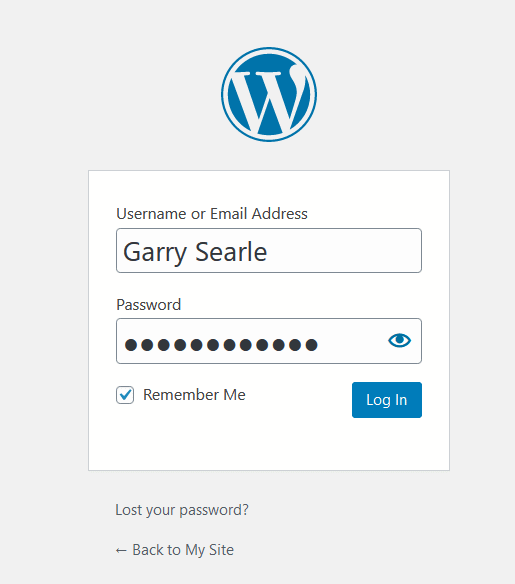
20 Enter the Username and Password you chose in Step 18 and click Log In.
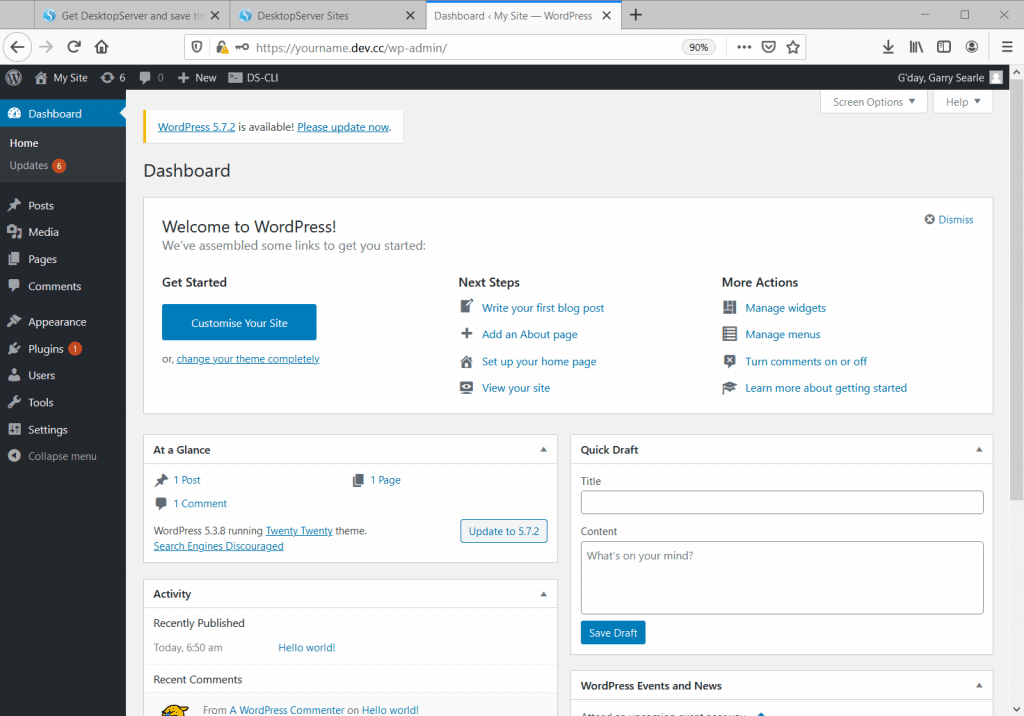
21 You are now at the Dashboard and ready to Create you Website!
The first thing to do would be to Update WordPress and install your Theme.
Starting Desktop Server once it has been installed
1 On the Taskbar, click the Desktop Server icon.
2 Note the warning when running on Public networks. Click next.
3 You might have to confirm to Windows that you want to run the program. Click Yes
4 When Done! appears (10-30 seconds), at this point you computer can now act as a Web server.
You could just close this window and open the site in your Browser. In the example our URL was https://yourdomain.dev.cc
Alternatively, click Next.
5 Ignore the options listed this time, click Sites
6 You can then choose to Visit the Site or the Dashboard by clicking the relevant buttons.
If the Desktop Server window is still open you can close it.
Closing Desktop Server
When finished working on the site it is good practice to Stop the webserver
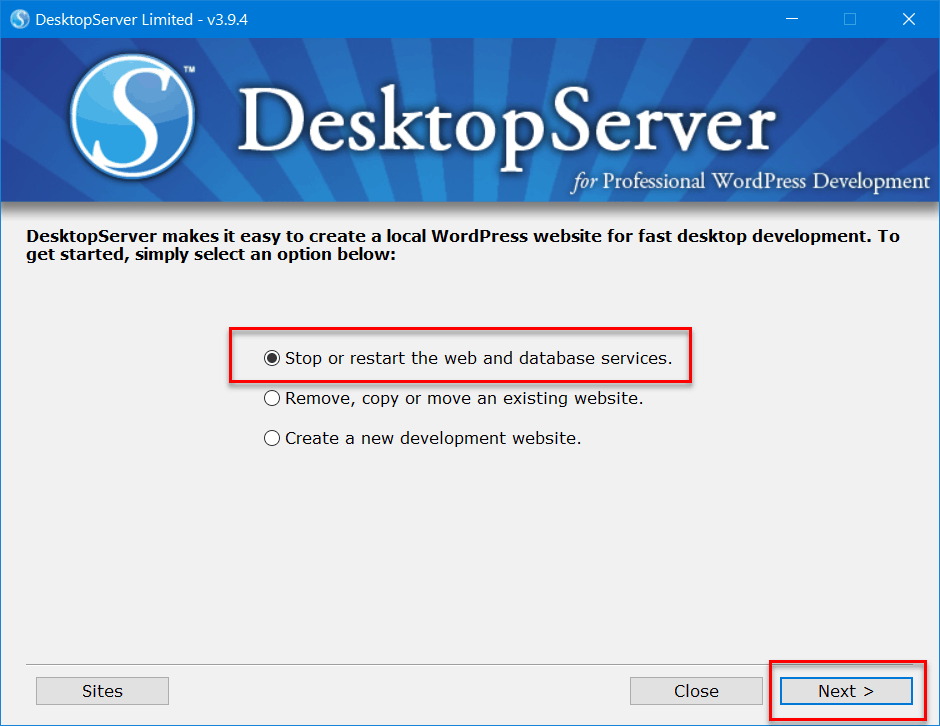
1 If the Desktop Server window is still open, switch back to that window, otherwise click the Desktop Server icon on the Taskbar.
2 Tick the option to Stop or restart the web and database services. Click Next.
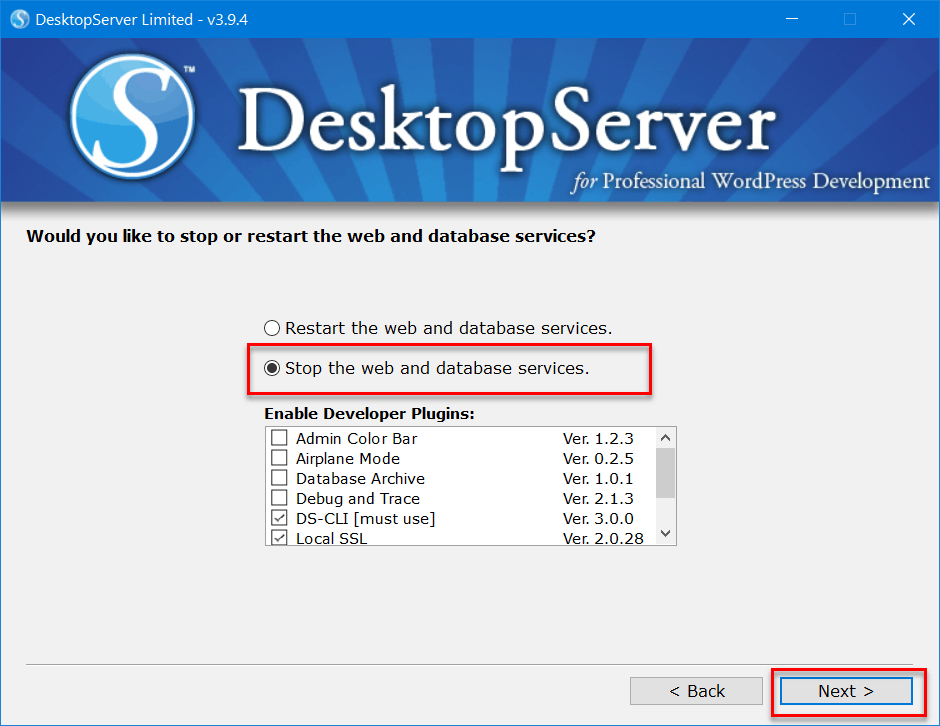
3 You might have to confirm to Windows that you want to run the program. Click Yes
4 Tick the option to Stop the web and database services. Click Next.
5 After just 10-30 seconds the Done! confirmation should show. Click Close.
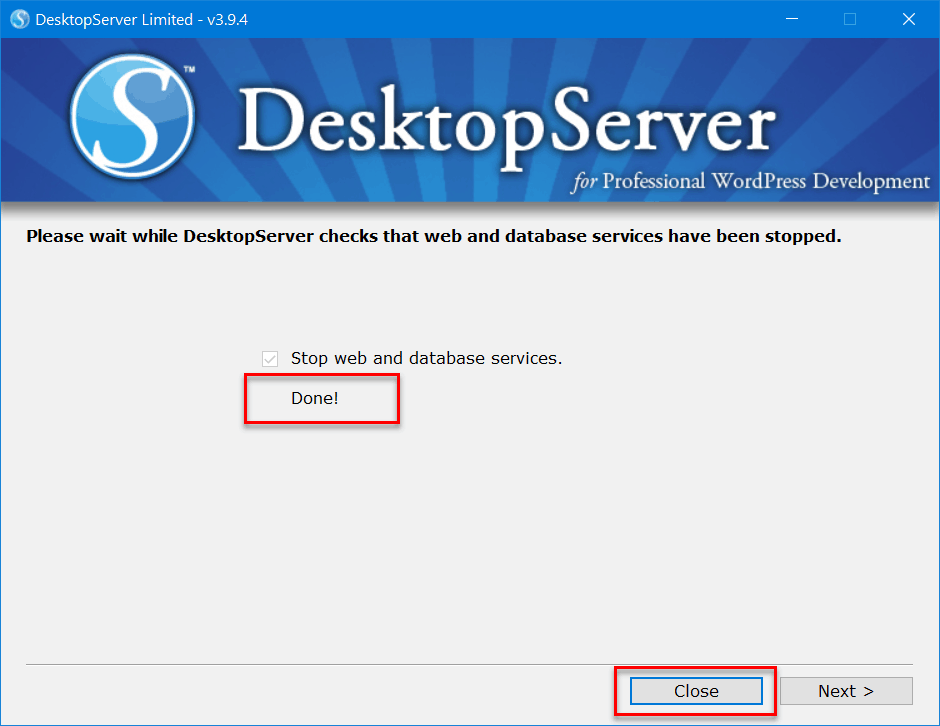
The Desktop Server is now closed.